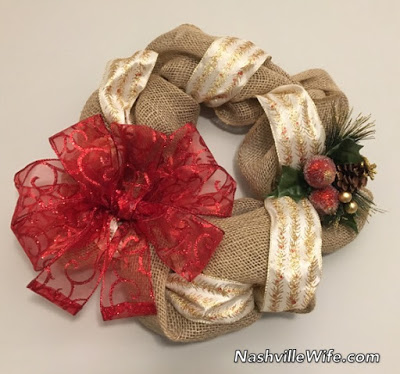
As promised, I have written up my Christmas wreath tutorial. Whether you’re looking for a holiday craft to do with friends, homemade gift ideas, or a decoration to “spruce up” (no pun intended) your front door, you’re going to love this tutorial.
Just take it slow on your first try, and you’ll find that these wreaths are far from difficult to make. If you run into a problem, you can always remove the wire, burlap, and ribbon and start over. Even if you do this craft with several other people and all use the same materials, each person’s wreath will be uniquely different.
Materials:
12-inch wire wreath form
15 feet of 5.5-inch-wide burlap ribbon (not wire-edged)
Wire-edged accent ribbon* (2 or 2.5-inch wide is ideal)
Floral wire
Wire cutters
Wire-edged ribbon for bow (2 or 2.5 inch-wide is ideal)
Embellishments for your wreath (optional)**
Glue gun
Wreath hanger
*You can use as little or as much accent ribbon as you desire, but you likely won’t need anywhere near a full roll.
**Ideas for embellishments include pine cones, ornaments, garland, artificial cranberries, and artificial greenery. Most craft stores have tons of options in their Christmas section. Hobby Lobby has an entire aisle devoted to such items.
Instructions:
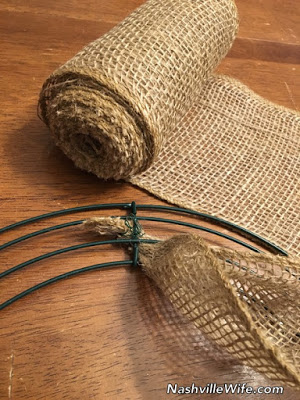
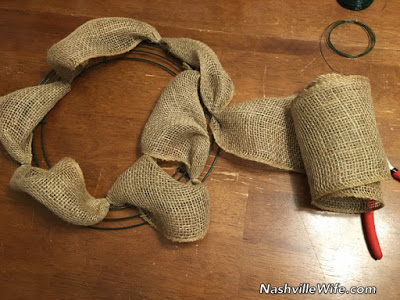
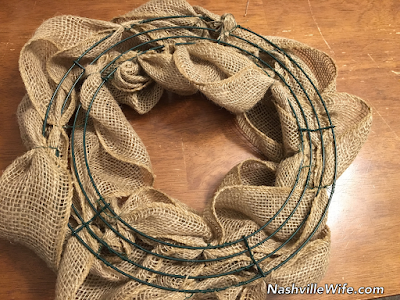
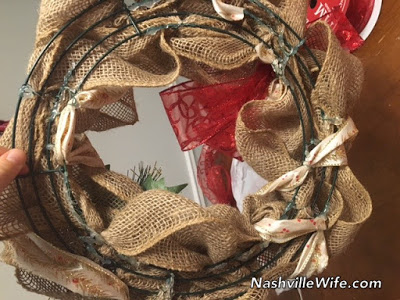
Use a piece of floral wire to securely anchor the end of your burlap ribbon to the wire wreath form.
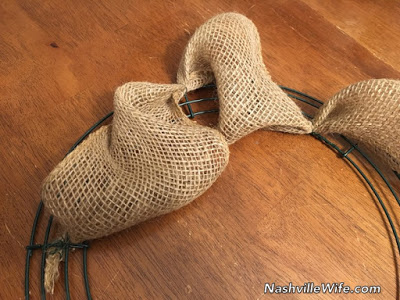
Leaving excess burlap, secure burlap with another piece of floral wire 3 to 5 inches from the first one.
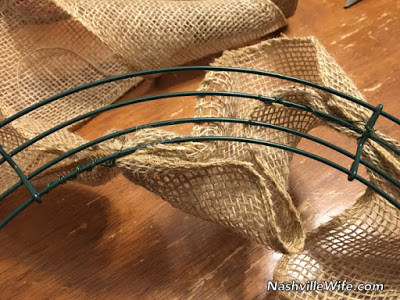
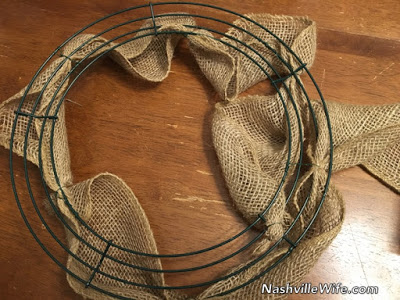
As you go along, be sure to wrap the wire tightly around the burlap, and then wrap any excess wire along the back of the wreath form.
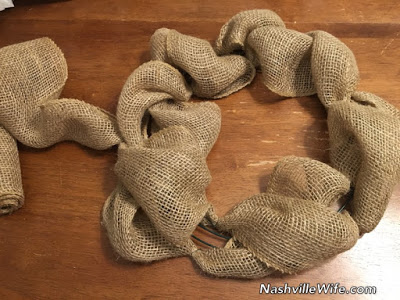
Continue once around the wreath form. Feel free to vary the distance between the wire pieces or keep the distance the same throughout. It’s entirely up to you. There’s no wrong way to make a burlap wreath.
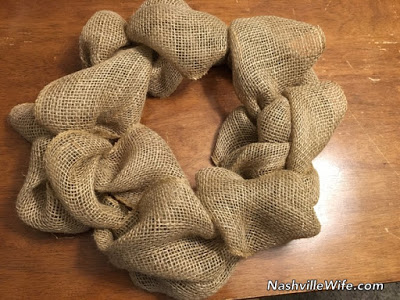
Once you have gone around one full time, go around a second time to fill it out.
If you think your wreath needs more burlap, feel free to go around a third time.
When you’re done, securely anchor the end of the burlap to the wreath form with a piece of wire.
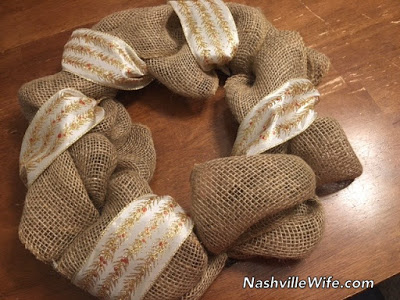
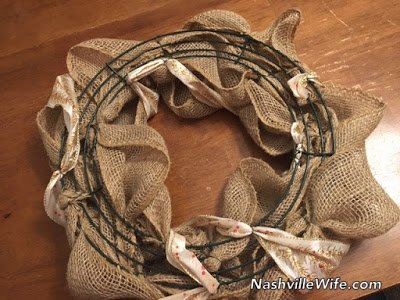
Do the same thing with your accent ribbon. Remember, you can use as much or as little as you want, depending on the look you are going for. You can wrap in the ribbon in the same direction as the burlap, or you can wrap it as I have done below:
Be sure to secure your ribbon to the wreath form with pieces of wire.
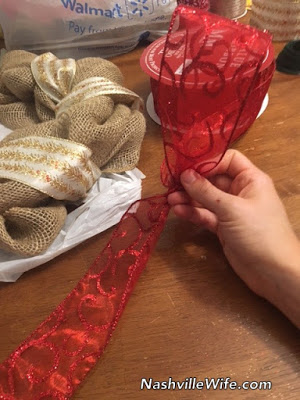
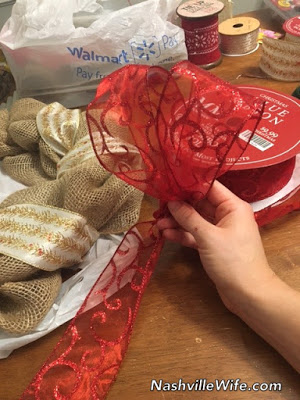
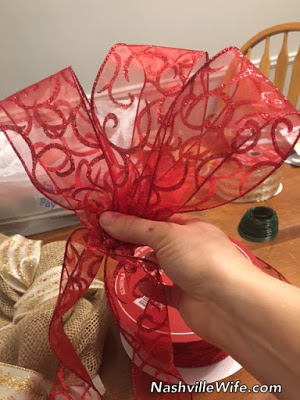
To make a bow, let out a piece of ribbon the length you want your tail to be, and then make a loop (making sure the design is facing out). Pinch the ribbon with your thumb and forefinger.
Twist the ribbon so the design is still facing out, make a second loop, and pinch the ribbon together.
Repeat for as many loops as you desire. I did six. When you’re finished, let out enough ribbon for the second tail, and cut. Use a piece of floral wire to tightly hold the center of the bow (where you have been pinching) together. If your bow doesn’t turn out the way you envisioned, don’t be afraid to start over. If you need more help, YouTube has tons of Christmas bow tutorials.
Add your embellishments. If they are on wire sticks, wrap the wire sticks around the back of the wreath form, and then secure with a long piece of floral wire. Secure your bow using floral wire. Next, you’ll want to heat up your glue gun and use glue to anchor the embellishments and bow (making sure the glue is not visible from the front).
When your wreath is finished, you’ll want to go over all the floral wire and burlap/ribbon ends with the glue gun. This will help keep them in place and ensure that the wire does not scratch the door or wall where you hang your wreath.
To keep the tails of the bow from fraying, I rolled the ends up just a bit and gently used a tiny dab of glue from the glue gun to keep them from unrolling.
Hang your finished product on the wall, or use a wreath hanger to hang it on a door.


Thank you for the tutorial. The wreath is lovely.
Joan,Marion and Marilyn
It's my pleasure!
Ellie
Cute wreath, Ellie!
Thank you! 🙂
Ellie
LOVE IT!!!
Thanks. 🙂
Ellie
Thank-you, love the wreath, shopping tomorrow for the materials. I just have to make myself one, can't wait to start…Jane
I would love to see a photo when you're done, Jane.
Ellie
My burlap wreath is done. I love it and I can't believe I did it myself. Will send you a picture as soon as my daughter stops in to help. Thanks…Jane
While the photos and text directions are nice, it would be great to see a video of you making it. Cute wreath, though!
Thanks for the suggestion! Have a merry Christmas.
Ellie
Oh man. Now i am definitely going to use this.
If you end up making one, I would love to see a photo of your finished product. 🙂
Ellie
Great tutorial, Ellie! Your wreath is simply gorgeous.
Thank you! You're very kind.
Ellie