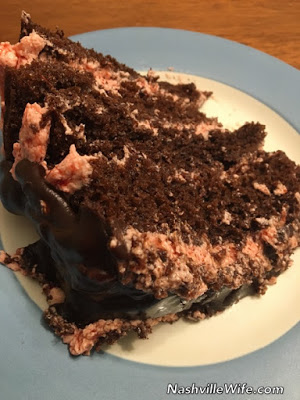
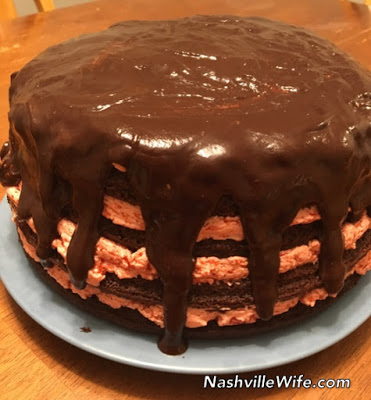
A few weeks ago, I shared the super moist chocolate cake recipe that I used to make my recent chocolate-covered strawberry cake. As promised, here are the recipes for the chocolate glaze and strawberry buttercream frosting, as well as instructions for assembling the cake. I am usually a fairly healthy eater, but I am in no way claiming that this is a healthy cake. Everyone needs a treat now and then!
Ingredients:
1-1/2 cup chocolate chips (I used semisweet)
6 Tablespoons butter
6 Tablespoons dark molasses
Directions:
1. In a saucepan on low heat, melt chocolate chips (stirring constantly).
2. Add butter and molasses, and stir until smooth.
3. Remove from heat. Allow to cool 25-30 minutes, stirring occasionally to prevent hardening.
Ingredients:
4 heaping cups frozen strawberries
3 sticks of butter (allow to soften at room temperature beforehand)
5 cups powdered sugar (also called confectioners’ sugar/icing sugar), sifted
1 teaspoon vanilla extract
1. Blend frozen strawberries in a blender, and transfer to a saucepan. Heat over medium heat, stirring constantly, for 10 minutes.
2. Remove saucepan from heat, and allow strawberry puree to cool completely.
3. Using an electric mixer, beat butter until light and fluffy.
4. Beat 2 cups powdered sugar into butter until blended. Beat in strawberry puree, 2 Tablespoons at a time.
6. Beat in an additional 3 cups powdered sugar. Add vanilla, and beat on high until smooth.
7. Chill cake and frosting (not glaze) in fridge briefly before assembling cake.
Place 1st layer of cake on a plate/platter, crumb side up.
Cover with layer of strawberry frosting
2nd layer of cake (crumb side up)
2nd layer of strawberry frosting
3rd layer of cake (crumb side up)
3rd layer of strawberry frosting
4th layer of cake (crumb side up)
4th layer of frosting
After the 4th layer of cake has been added, feel free to do some piping on the edges to enhance the appearance of the cake. (I just cut a tiny piece off the corner of a small, Ziploc bag and filled it with strawberry frosting.)
Cover top of cake with chocolate glaze. I recommend moving very slowly with this step, using a spoon to gently drop glaze on top of the cake and let it run over the sides.


Amazing! That would be a lot of work and expensive. It seems to be out of my league, I am afraid. But, if I saved, sacrificed my coffees out and planned and shopped I might just be able to accomplish this too. I am sure everyone was very appreciative when they saw that cake!
Thanks. 🙂 There's definitely quite a bit of work involved, and the ingredients can be expensive. (I recommend Aldi and Walmart for cheap baking ingredients.) The cake doubled as a birthday present for my sister-in-law, so that helped with the cost. And seeing the look on her face made it so worth it. If you give it a try, I would love to know what you think.
Ellie
Ellie, I could so eat that slice in the picture 🙂 it looks so yummy. You sure know how to get the taste buds going…it's screaming, "I want chocolate right now" lol
This cake looks so luscious, decadent and delicious! A real masterpiece for special occasions! I would love just one bite! I always enjoy your recipes Ellie, and this is no exception. What a wonderful gift for Anne. Did you come up with it yourself? Eileen